Netlify is one of the most prominent MERN stack deployment platform. Their generous free tier made it home to many developers’ playground and even permanent home. CloudFlare pages is the new player in this field but with even more generous free tier. The main difference is Netlify limits free tier with 300 build minutes while CloudFlare has 500 deploys limit irrespective of how long the build takes.
Requirements:
- Cloudflare Account
- Netlify compatible theme for a MERN Stack development
CloudFlare already has a migration guide for Netlify users, but it only considers moving build command and output folder which may not be enough for every theme out there. This guide allows you to thorougly analyze and move the build environment.
To move your Netlify build infrastructure to CloudFlare or just start on CloudFlare pages right away, first you need to configure a compatible development environment, build command and paths. Most MERN stack themes configured to work with Netlify will have a “netlify.toml” file in the repository’s root. This file comprises configuration details needed for successful deployment. All you need to do is move the configurations properly to CloudFlare Pages build setup.

For an example we’ll use a netlify toml file for Influencer Hugo theme:

The publish key reflects the “Build output directory” and command is “Build command” for CloudFlare Pages. Move the value for these keys to CloudFlare Pages. For “build.environment”, create environment variables manually in CloudFlare Pages.
This is what it would look like on CloudFlare Pages:
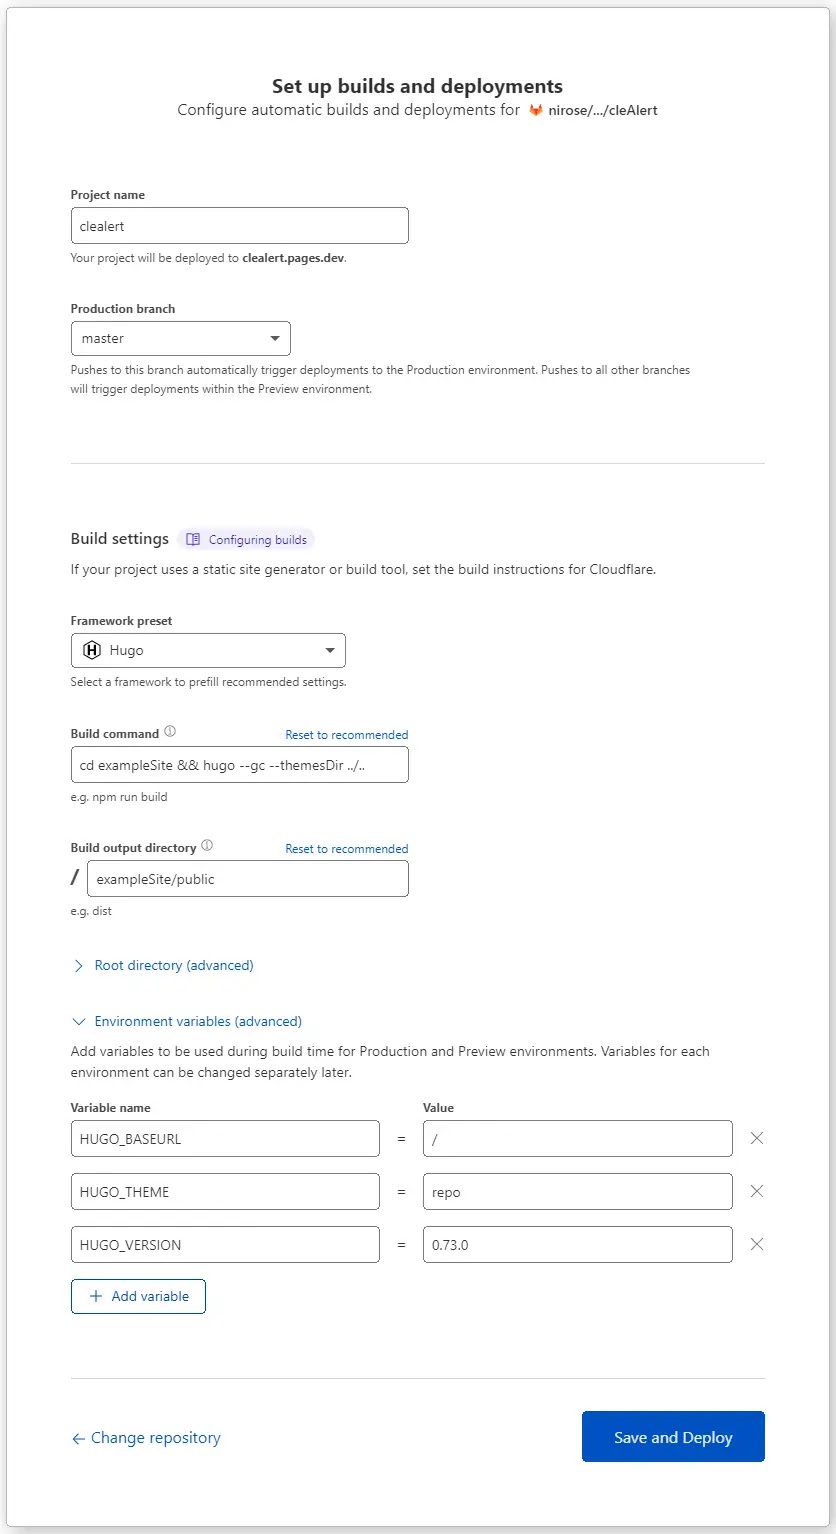
And that’s it. “Save and Deploy” then wait for it to complete. It is most likely to build successfully as it has exact configuration settings to a Netlify build setup. Let us know if there were any edge cases that didn’t work out.