This is a simple tutorial on how to create an wireless adhoc network with Windows XP. Just follow these simple steps and you will be able to create your own wireless network to share files or play multi player games like CounterStrike, Warcraft, Call Of Duty and others.
The first step is to enable your Windows XP to let other computers connect to your PC or a Laptop. For this
- You have to go to open your “Network Connection” from your Control Panel.
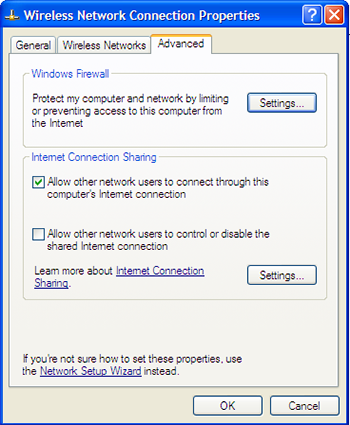
- Then choose your Wireless Network Connection. Left click it and open it’s “Properties“.
- On the new window Open the Advance tab.
- Under “Internet Connection Sharing“, enable “Allow other network users to connect through this computers internet connection“.
After this Windows will be able to accept incoming connections for your adhoc. Now lets create a adhoc wireless connection.
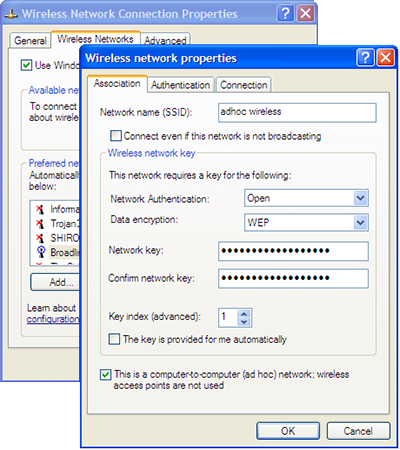
- Go to the “Wireless Network” tab on the same window.
- Under the “Preferred Network” section Click on the “Add” button.
- A new Wireless network properties” will pop up.
- Configure “Network Name” for the name of the adhoc wireless connection.
- Configure “Network Authentication” and “Data Encryption” for security. Keep the Network authentication Open and Data encryption disabled to enable anyone to join the adhoc network.
- But if you want only selected people to access you can add “Data Encryption” to WEP. You’ll have to untick the “This key is provided for me automatically”, so you can add your own network key for authentication.
- Tick the “This is a computer-to-computer(ad hoc) network” option at the bottom.
- On the ‘

